
Reveni Labs
Remote Control Shutter Release
User Manual and Operating Instructions
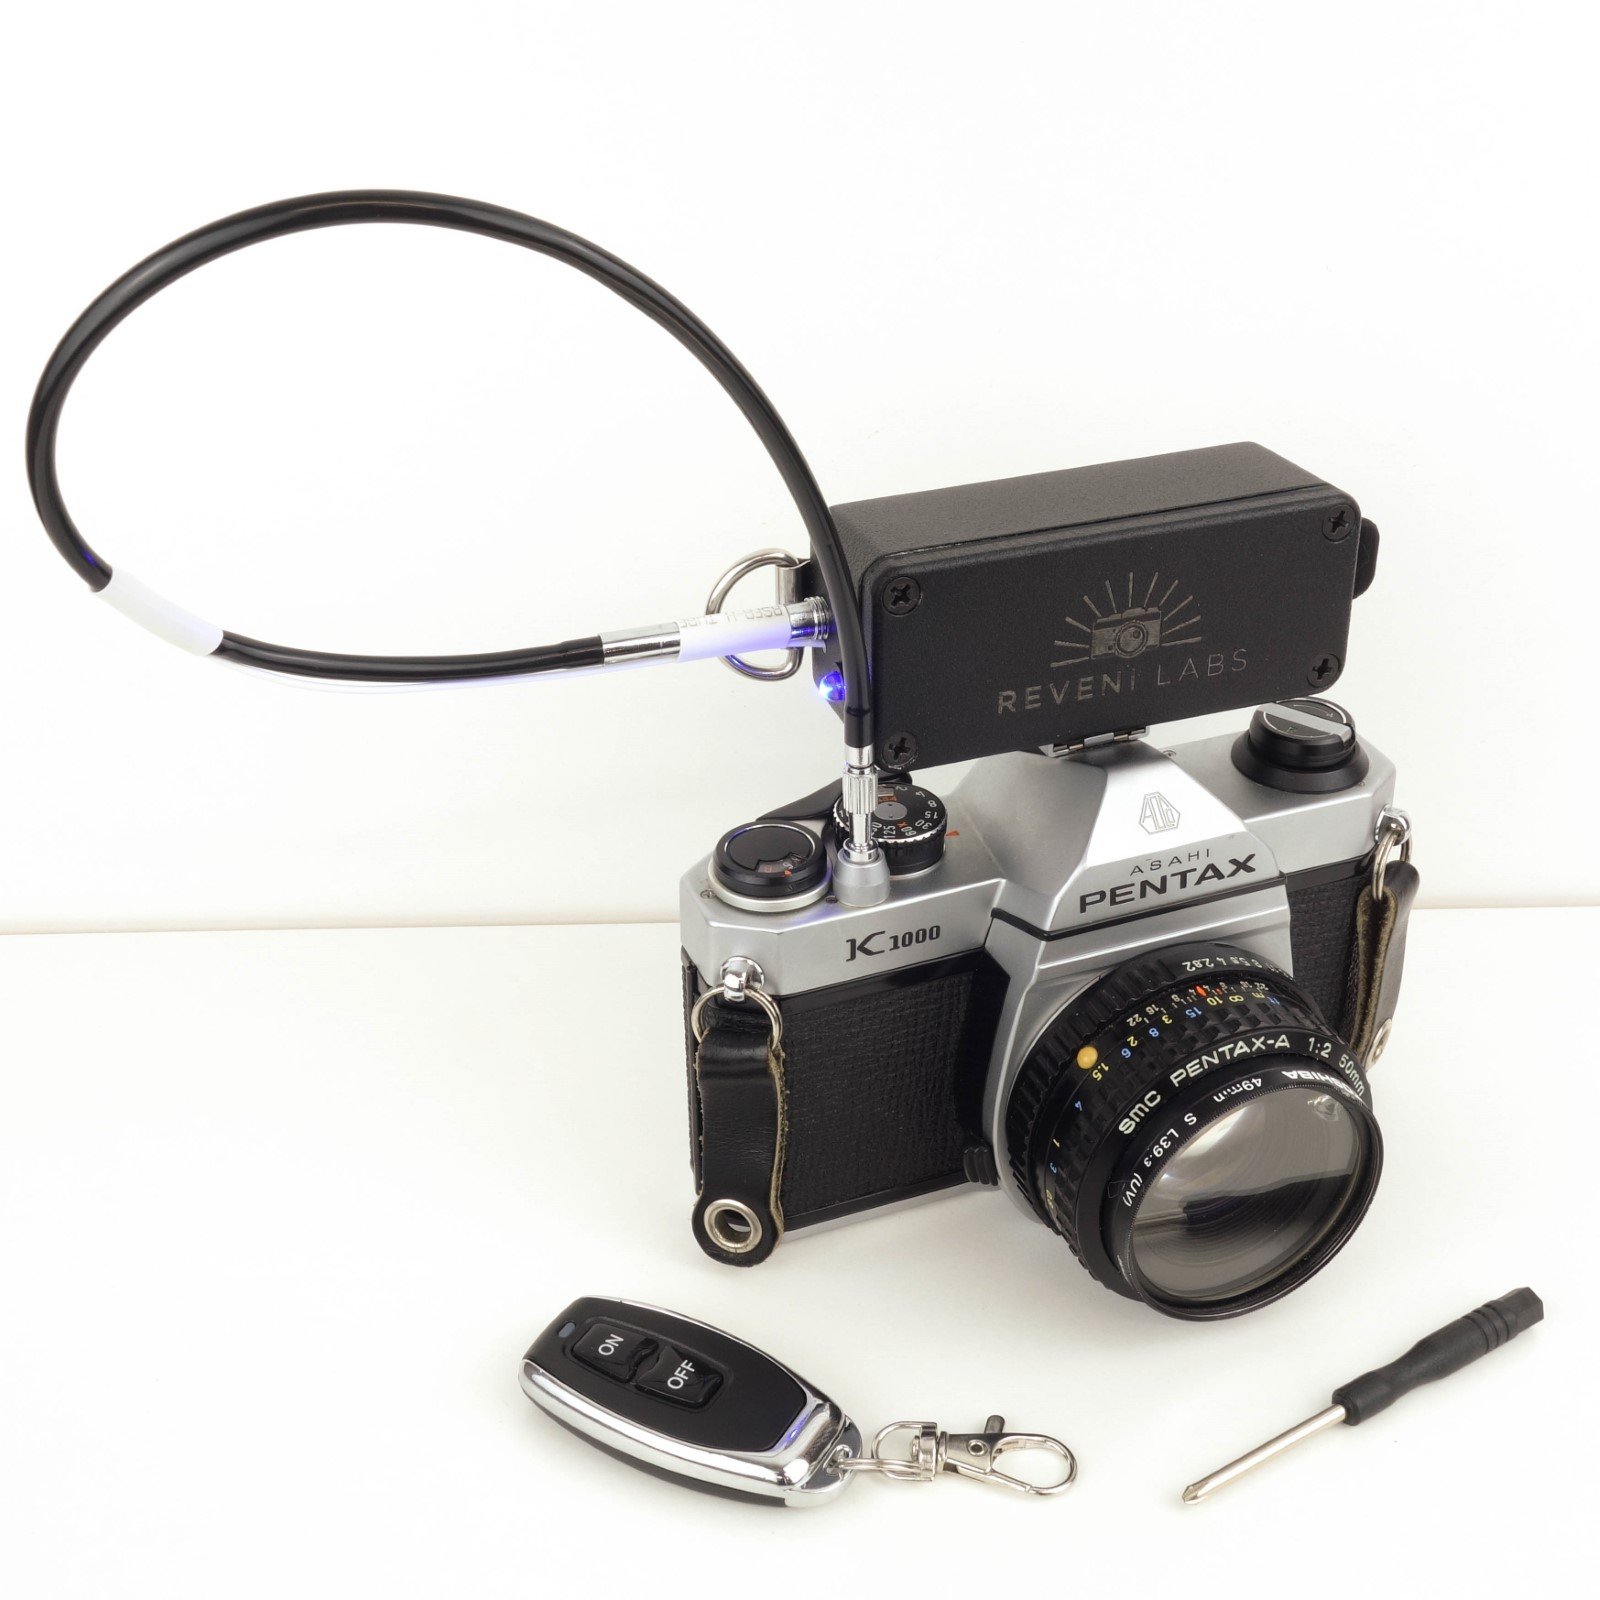
Features and Layout

Features
Features
Hand-made in Canada
Black painted aluminum receiver
Mixed metal/plastic 2-button remote control
One button to trigger, one to release, no holding required
100 meter (330ft) line of sight signal range
Red/blue LED indicator (red for pressed, blue for released)
15” (40cm) shutter release cable with standard thread and pin
Hot/cold shoe for mounting on top of camera
D-ring for hanging from tripod
Works in BULB mode or with shutter timing settings
Triggering delay time approximately 1-2 seconds (camera dependent)
Specifications
Enclosure size - 3.65 in x 1.52 in x 1.22 in (93 mm x 39 mm x 31 mm) black aluminum
15” cable length
330 foot (100 meter) line of sight signal range
Receiver power: 2x AA battery (NOT INCLUDED)
Remote power: 2x CR2016 lithium coin cell (NOT INCLUDED WITH INTERNATIONAL SHIPMENTS)
Receiver battery life: ~20 hours
Remote Control Batteries
North American customers will have batteries already inserted in the remote control. International customers will need to provide two CR2016 lithium batteries, due to shipping limitations on lithium batteries.
To install batteries
Open the back of the remote by removing three phillips head screws
Remove the empty black plastic ring from inside the silver battery retainer by sliding sideways
Insert two CR2016 batteries into the plastic ring, (+) facing the flat part of the retainer
Insert the plastic ring with batteries into the silver battery retainer
Reinstall the back and three phillips head screws

Left: Remote with batteries installed Right: Remote with batteries removed and laid out
Preparing the Remote Control Shutter Release
Use included screwdriver to remove the four cover plate screws
Install two AA size batteries. They can be 1.5V alkaline types or 1.2V NiMH types. The expected number of camera triggers is 100, depending on the frequency of use.
Close the cover plate and replace the four cover plate screws
Flip the power switch to turn it on, the LED will light up
Battery Level Indication

Operation
Attach the Remote Control Shutter Release to your tripod via the D-ring/wire keyring or to your camera via the cold shoe foot
Attach the threaded tip of the release cable to your lens/camera shutter button
Power on the Remote Control Shutter Release. It will retract the cable automatically if the cable is not already retracted (this makes a small beep sound)
Cock your camera’s shutter. If possible, test the shutter release before taking your actual photo. If you’ll be near the 330ft (100 meter) maximum range, test that the shutter release will work from your intended triggering location.
Take your photo by pressing the ON button on the remote control. When the shutter release is moving, the LED will turn off. When the release is in the triggered position, the LED will turn RED.
After the camera’s timed shutter has closed, or sufficient exposure time has elapsed, press the OFF button on the remote. The LED will turn off while moving, and will turn BLUE when releasing is complete.
If your camera permits, you can trigger the camera again to take additional photos.
Notes On Care
Don’t store the Remote Control Shutter Release for long periods of time (1 year or longer) with the batteries installed, as AA batteries may leak with age
Do not submerge any part in water or use in heavy rain
Contact
Contact matt@reveni-labs.com with any questions or concerns.